|
This blog post also is a review of the Panasonic Lumix DC-FZ80 bridge camera, which I have used for the past five years. Aimed at hobby photographers who want to enjoy bird photography but don't wish to have a large outlay to get started. I checked my records and I purchased this camera and accessories (including camera bag, memory card) new for NZ $653 (around US $408). It was on sale plus I asked the salesperson if he would add anything to my purchase. I saved approx $200 of the retail price of the combined items. All the photos here, I took with this camera. I've cropped some and done subtle adjustments for a more pleasing composition. Subtle, as I prefer a more natural look with photos. I've also reduced the file sizes significantly for uploading to a website. The original file sizes can be printed clearly at at least 8x10 inches (approx 23.3 x 25.4cm). 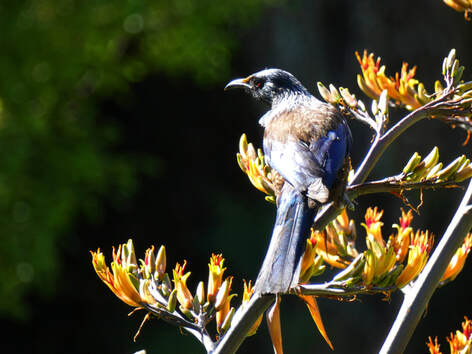 Why did I buy this bridge camera? Mainly for the superzoom lens and reasonably compact size and ease of use for the low price point. I wanted the superzoom lens for bird photography. I wanted the reasonably lightweight and compact size to carry during nature walks. I didn't have lots of spare money to spend on a camera. I enjoy taking photos of birds (and nature in general) and the photos often are used as reference pics for my paintings (I put my own creative spin on my paintings). DSLR (digital single-lens reflex) and mirrorless cameras used by professionals can be VERY expensive. I used to work as an assistant for some photographers and their cameras were well over $5000 and the chief photographer's high-end camera with lenses was $100,000! Plus, he apprarently did most of his wildlife photography using the aperture priority mode (which the photography purists (or snobs) like to call the 'cheat modes'. Even though I understand photography basics, I tend to use 'auto' for most of my pics. Although, I am making it a goal this year to learn more settings on the camera. Time is of the essense with birds and when I am wanting a quick shot before the bird flies away, I haven't had time to fiddle with settings. So it's basically, zoom into the bird, quickly compose a shot and click a button. I've taken lots of bird photos, with no special set ups. Just go to places where I know there will be wild birds (lake, river, nature reserves, sanctuaries). 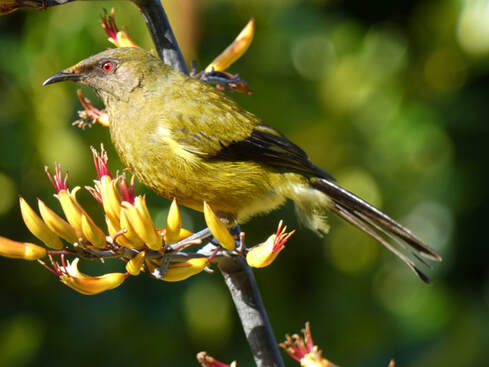 The zoom lens on this camera has a huge range from 20-1200mm optical zoom (I think that's in 35mm equivalent). Which would be at least three lens with detachable lenses. Which has a depth when closed of under 12 cm and a weight of under 700 grams. All the pics in this blog post were without a tripod (I don't actually own one yet, plus I don't want to be weighed down with gear). The experts say that the images won't be as sharp with a bridge camera lens but it's good enough for my needs (and budget). I don't see myself lugging a heavy and cumbersome telescopic lens around (even if I could afford one). A mobile phone isn't going to cut it for bird photography, as can't really get close enough. I have seen some little gimmicky zoom gadgets advertised that are supposed to clip onto the phone. I'd probably drop the phone with it. I have taken the odd photo or video clip of birds with my phone but they are definitely inferior in quality to a camera with a zoom optical lens. I have used a film DSLR before (Canon, with two basic kit lenses if I recall correctly; it belonged to my ex) and yes, I'm showing my age. I think it took better quality pics than the bridge camera but one advantage of digital is one can take as many pics as they like, without worrying about costs of purchasing and developing film. It can be a hassle to change lens, more suited if ready to photograph something at a given distance. There has been one annoying downside to the Panasonic, in that the lens can get 'stuck' or a bit confused so tells me to turn the camera off (which resets it). This happened with the pic of the bellbird above, so by the time I did that, the bird flew off, before I could get a better composition (the bird looked a bit cramped, although had good detail). 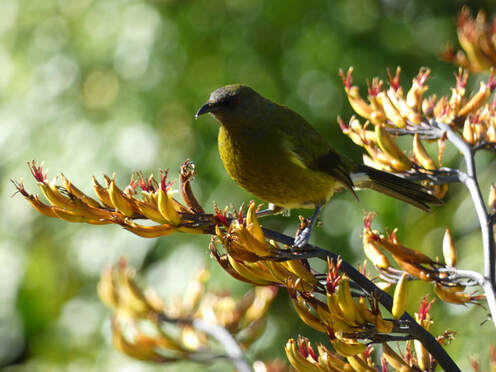 The above pic, of a different bellbird is in my opinion, a better composition but some of the bird is in shadows. If I want to paint a bellbird, I could combine these images, as a guide. What I am pretty good at, I think, is quickly composing an image, before pressing the shutter button. Although, photography is getting harder for me, with my worsening eyesight. I now have three different eyesight issues (myopia, astigmatism, presbyopia) which in a nutshell means even with corrective lenses, I have trouble seeing. Looking through the optical viewfinder with or without glasses doesn't work for me. The Lumix has both an optical viewfinder and an LCD screen. I use the latter, although it's not great if wearing sunglasses and in certain lights. It's now harder to get pics of smaller, fast birds, as I can't see well both the bird in the distance and the LCD screen (even with progressive lenses). That's more a wonky eyesight issue than a camera issue. 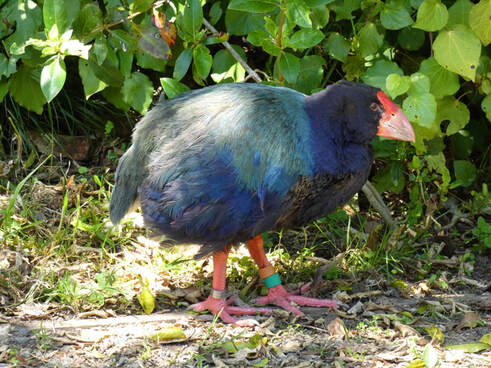 With larger subjects, the autofocus works quite well. It's taken me years, but I'm only starting to figure out my preferences with focusing, which can be useful for smaller birds in a tree for example. The takehe above was with auto. I also zoomed in a bit, below. 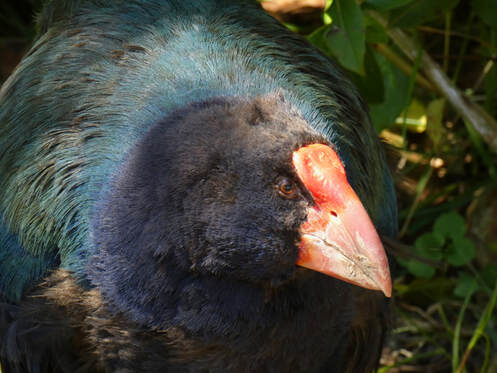 I've had some very good sunrise pics (when I can manage to get up in time, which is almost never) and sunset pics. A shag was preening on a rock at sunset, so I took several photos, including some zoomed in more. It was taking its time, so could I, making a more artistic shot. 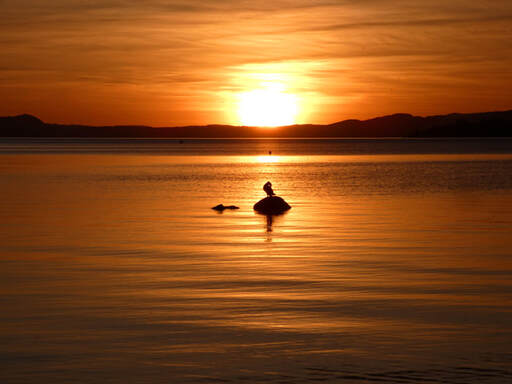 I later used the photos as inspiration and references for a painting. 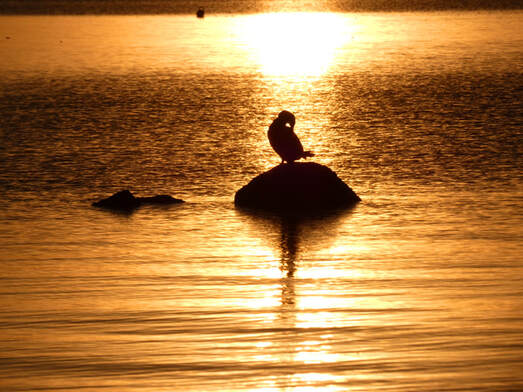 Just showing here that can get very good detail zooming in - in this case, a swan's behind. 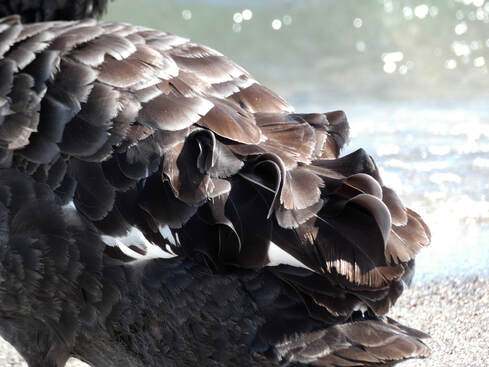 Birds in flight can be a bit hit and miss. I used the shutter priority mode to increase the shutter speed, to try 'freeze' the bird in flight. The focal length (35mm equivalent) was 200mm (pretty close) in the pic below with a shutter of 1/2000. I could probably have gotten away with a lower shutter speed, as the bird was quite slow. I went to to a location with lots of birds and had lots of duds. I haven't actually tried out the burst mode with birds, which is several shots per second. Partly because it's noisy (might scare the birds). Partly because it takes up lots of storage space. Partly because it heats the camera up. Partly because I like the challenge of a single shot. 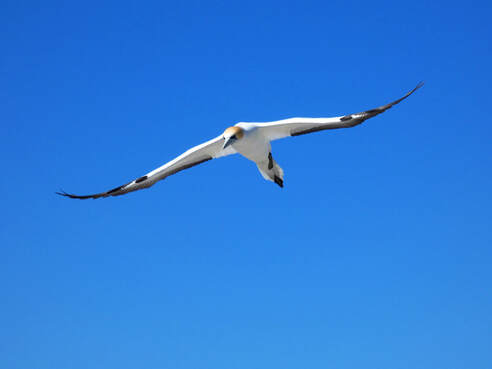 Now, in low lighting, that's where the Lumix has a weakness. Bridge cameras have a smaller sensor size, which performs poorly in dim light. I used shutter priority with the photo below. I was at a santuary which had a feeder, so I could have several attempts at just single shots. The combination of the higher shutter speed (letting less light in and making things darker) plus being in shade anyway, with some dappled light, was a bit much for the camera (or my skills). There is a grainy look to the images compared to the images in better lighting. This is from 'noise' from the sensor. Still good enough as reference pics for painting, though. 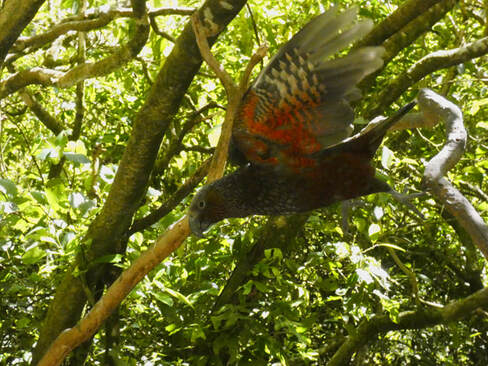 I saw some professional wildlife (including bird) photographers say they use aperture priority mode for just about everything. The logic was in case the lighting changes, so the shutter speed isn't a fixed guess and to maximise the light. With keeping an eye on the shutter speed recommended so that it doesn't drop too low. Aperture priority is about how much is in focus, which can give a more appealing, less cluttered blurry background. I haven't actually used aperture priority much (I find it a bit confusing, even thought I understand the general idea) but I've been experimenting. The pic below of the small waxeye was with aperture priority and letting the camera choose the IOS and shutter speed. The expensive gear that the pro photographers use have bigger sensors and longer lenses. The pros also say to always shoot in RAW. Well, that makes sense if someone has all the fancy gear, the fancy software to edit it with and loads of storage for the bigger files, plus lots of storage space for the gear. The camera is capable of shooting in RAW but I don't have the super duper software nor can I be bothered spending ages editing it anyway. The rest of the plebs like me will be happy shooting in JPEG on my lower cost cameras. Editing if I feel like it with my lower cost software. To enjoy my pics which aren't being published in fancy magazines. 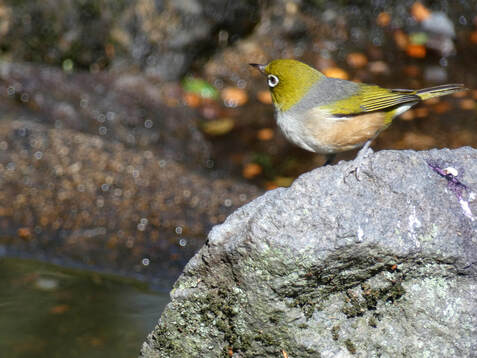 After doing some research, I have purchased a secondhand DSLR camera and two lenses, with one going up to 250mm. Some of the pics in this blog post were taken under 250mm. It's just a matter of quietly getting closer to the birds.
The reason I purchased an entry-level DSLR, is they are coming down in price with lots of people switching to mirrorless. I could get the second hand DSLR body and two lenses for around the same price total as a new Lumix. I would like the slightly bigger sensor of the DSLR, to hopefully get some better pics in low light. Experiment with some bird and nature pics but also get better quality photos of my art. Get more experienced with camera settings. Develop more skills for the best pics I can get with the equipment I have. A lot of people are surprised when they see my art, as it's a lot more vibrant than the pics show. If I wanted prints, it would be better to shoot in RAW. If you aren't familiar, RAW is a bit like a negative that hasn't been processed. JPEG is already mostly processed by the camera and has more limited capacities to further edit. RAW is used by professionals who spend a lot of time editing some pics for the highest quality printing. It also takes up loads of storage when rack up photos. (I used to work in the image library for professional photographers - they needed multiple servers to store hundreds of thousands of photos). Then there was a big room with several filing cabinets from the film days. The camera also takes around 15-20 minutes of video before it needs recharging. The videos are not super sharp but good enough for YouTube. Anyway, I hope that this blog post shows that one doesn't need fancy and expensive gear to have some fun.
0 Comments
Leave a Reply. |
Xanthe Wyse('Zan-thee Wise'). 
Disclaimer: the author of this blog is not an expert by profession and her opinions should not be taken as expert advice.
Archives
March 2024
Categories
All
|
 RSS Feed